> ## Documentation Index
> Fetch the complete documentation index at: https://docs.sellagent.ai/llms.txt
> Use this file to discover all available pages before exploring further.
# Twilio SIP Trunking Setup
> Step-by-step guide to connect your Twilio account via SIP trunking. Connect your existing Twilio phone numbers to Sell Agent using Elastic SIP Trunking for seamless call handling.
## Steps
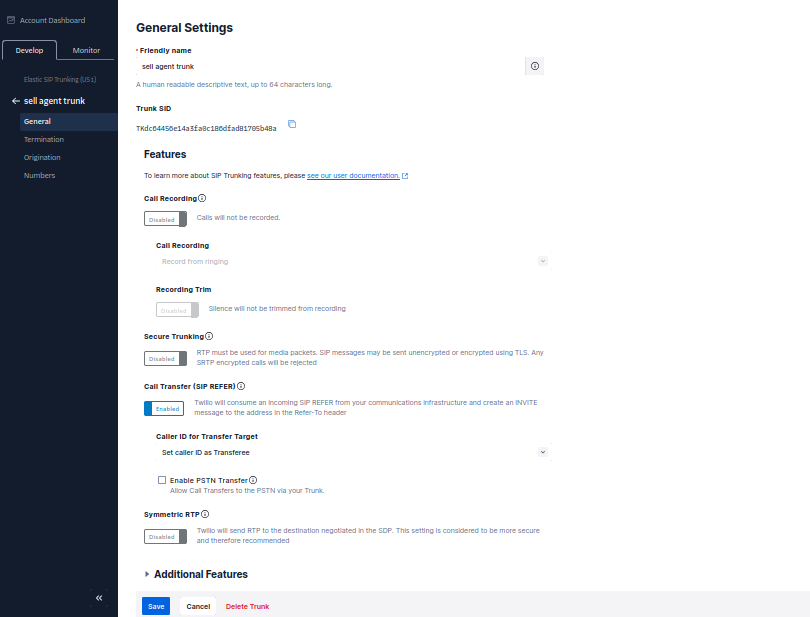
1. Create the trunk, give it a name, and toggle some general settings
* Name it (e.g., "sell agent trunk")
 2. **Configure Termination (this is for outbound)**
* the termination SIP URI here is important, we would use it in later steps. You might want to use a localized termination uri that’s near your region. You can expand and view your localized uris in the twilio console.:
2. **Configure Termination (this is for outbound)**
* the termination SIP URI here is important, we would use it in later steps. You might want to use a localized termination uri that’s near your region. You can expand and view your localized uris in the twilio console.:
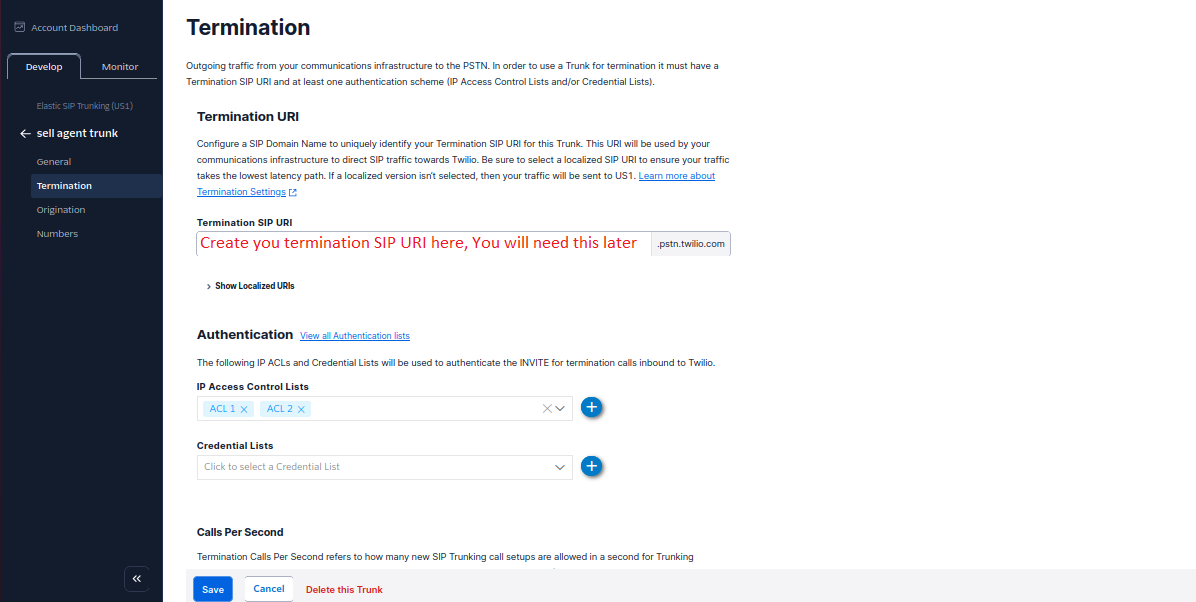 * For your elastic SIP trunk to accept our outbound request, you need to whitelist IP address or create a auth with username and password.
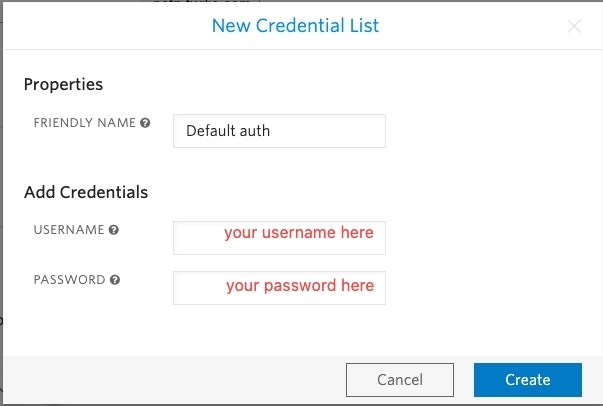
* If you opt for the auth route, you need to specify the username and password in the next step when importing the number to **Sell Agent**.
* For your elastic SIP trunk to accept our outbound request, you need to whitelist IP address or create a auth with username and password.
* If you opt for the auth route, you need to specify the username and password in the next step when importing the number to **Sell Agent**.
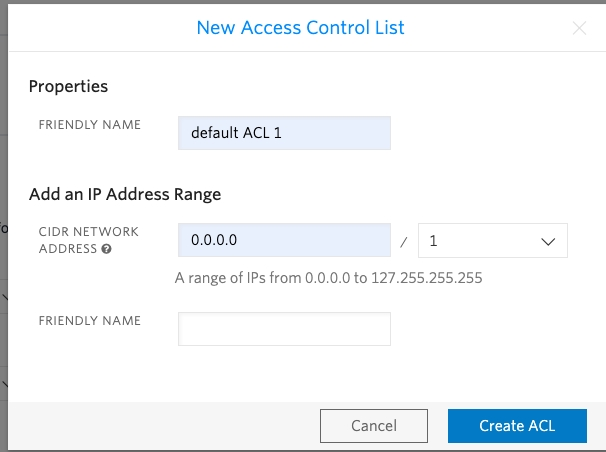
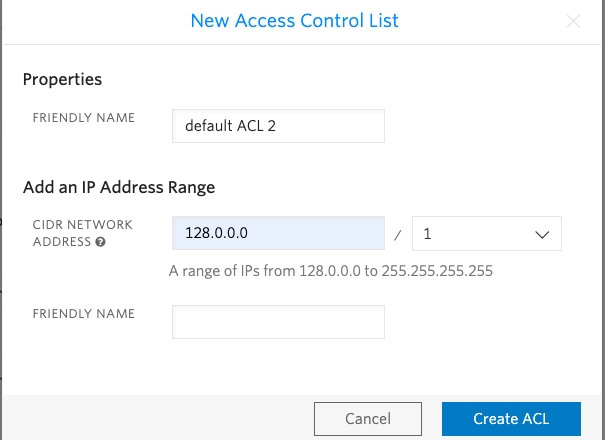
 * Currently **Sell Agent** SIP server does not have a static IP, so if you opt for the IP route, you need to whitelist all the IP addresses in the range like following:
 3. **Configure Origination (this is for Inbound)**
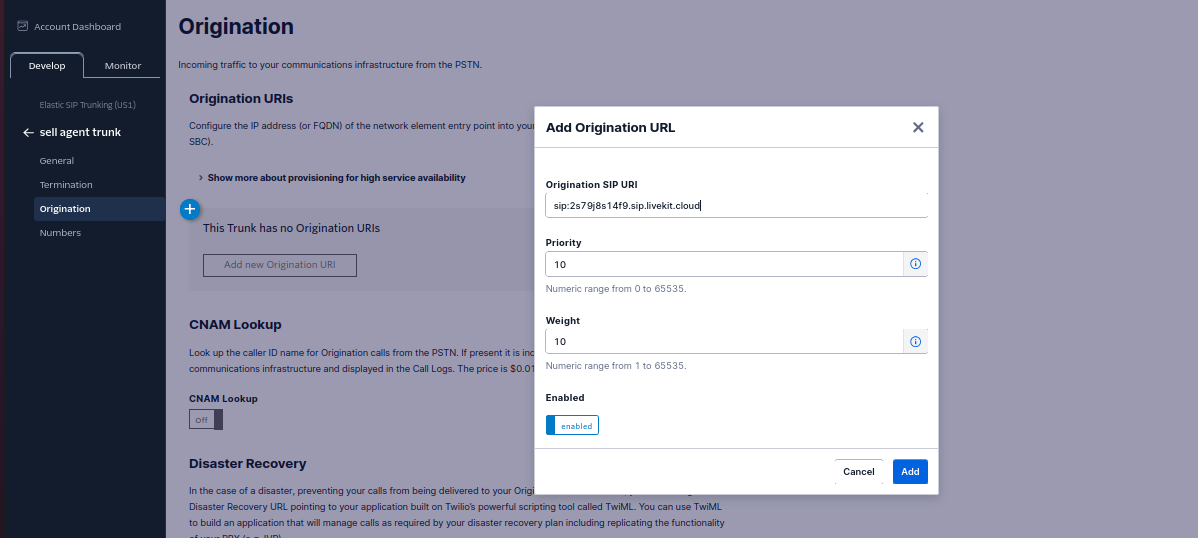
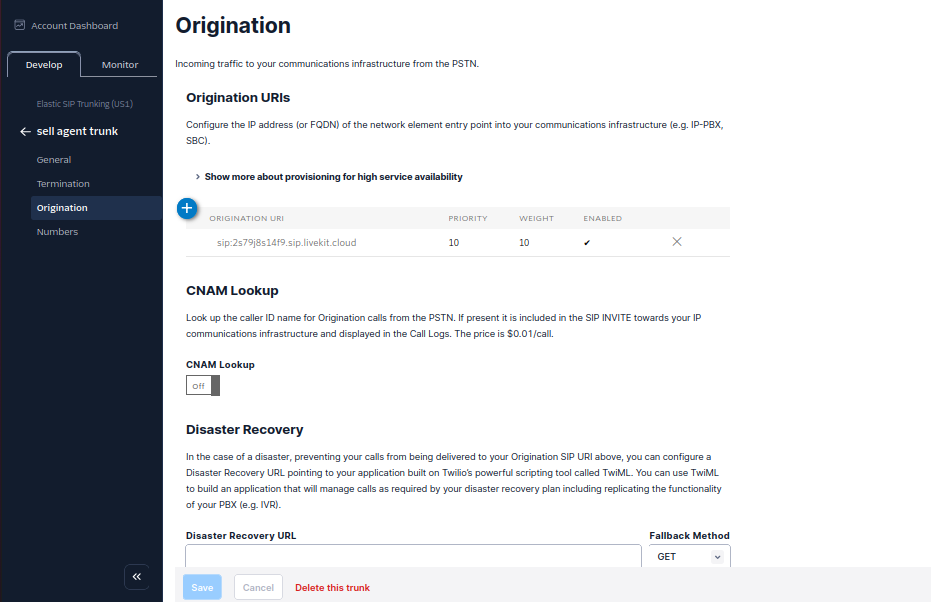
* Here you will specify **Sell Agent's** SIP server address as the origination SIP URI:
```
sip:2s79j8s14f9.sip.livekit.cloud
```
3. **Configure Origination (this is for Inbound)**
* Here you will specify **Sell Agent's** SIP server address as the origination SIP URI:
```
sip:2s79j8s14f9.sip.livekit.cloud
```
 You’ve created the elastic SIP trunk, now you would need to purchase numbers / move existing numbers to this trunk.
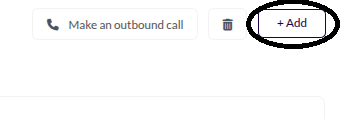
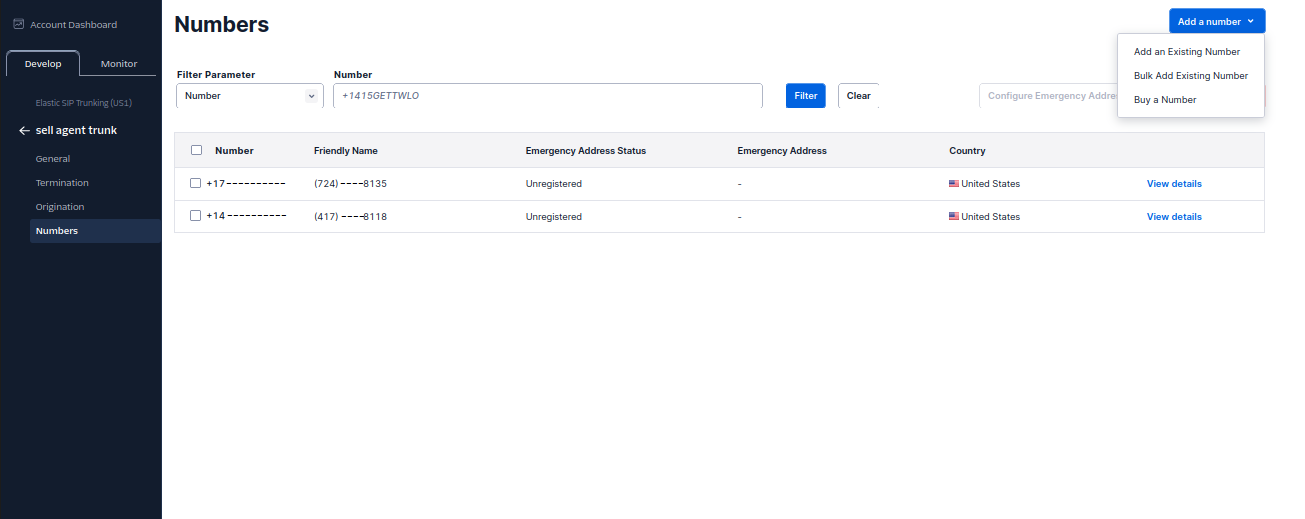 Now the number is set up with your elastic SIP trunking, you need to import the number to **Sell Agent** so that we will know how to route the call.
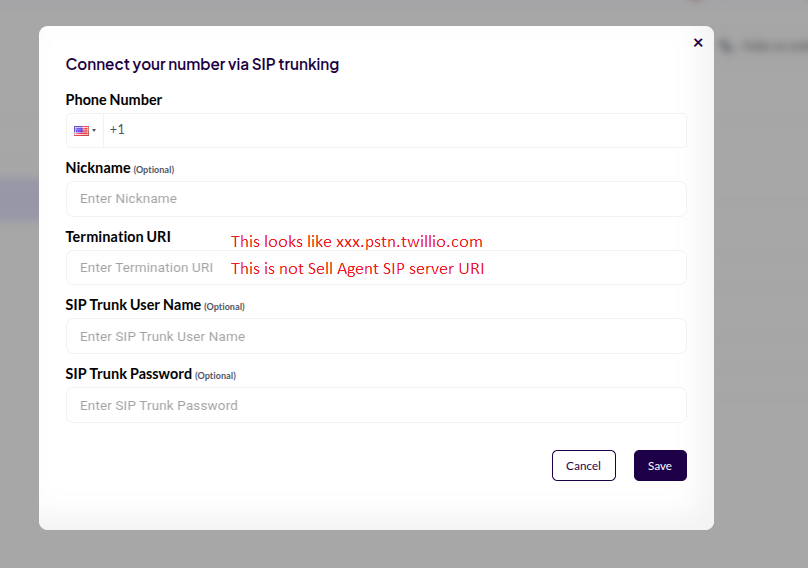
 Here you will supply the termination SIP URI you set up in Step 1. If you have set up auth via credentials, you will need to supply the username and password as well.
 You can also import a number programmatically using the\
****[Create Phone Number API](/api-reference/phone/create)****.
Now the number is imported, you can make and receive calls with this number — it will show up in your dashboard, and you can make phone calls from Dashboard directly. You can also use the ****[Create Phone Call API](/api-reference/call/create-call)****. to create calls programmatically. If you wish to **Sell Agent** to stop using this number, you can delete it from the dashboard or via the ****[Delete Phone Number API](/api-reference/phone/delete)****.
## Common Issues
**1. Inbound calls work, but outbound calls do not?**
* Check your Termination SIP URI ensure there are no spaces in your Termination SIP URI. Also, make sure you’re using a localized URI appropriate for your region.\
👉 Refer to [Twilio’s SIP Region Guide](https://www.twilio.com/docs/sip-trunking#termination-uri) to select the correct one.
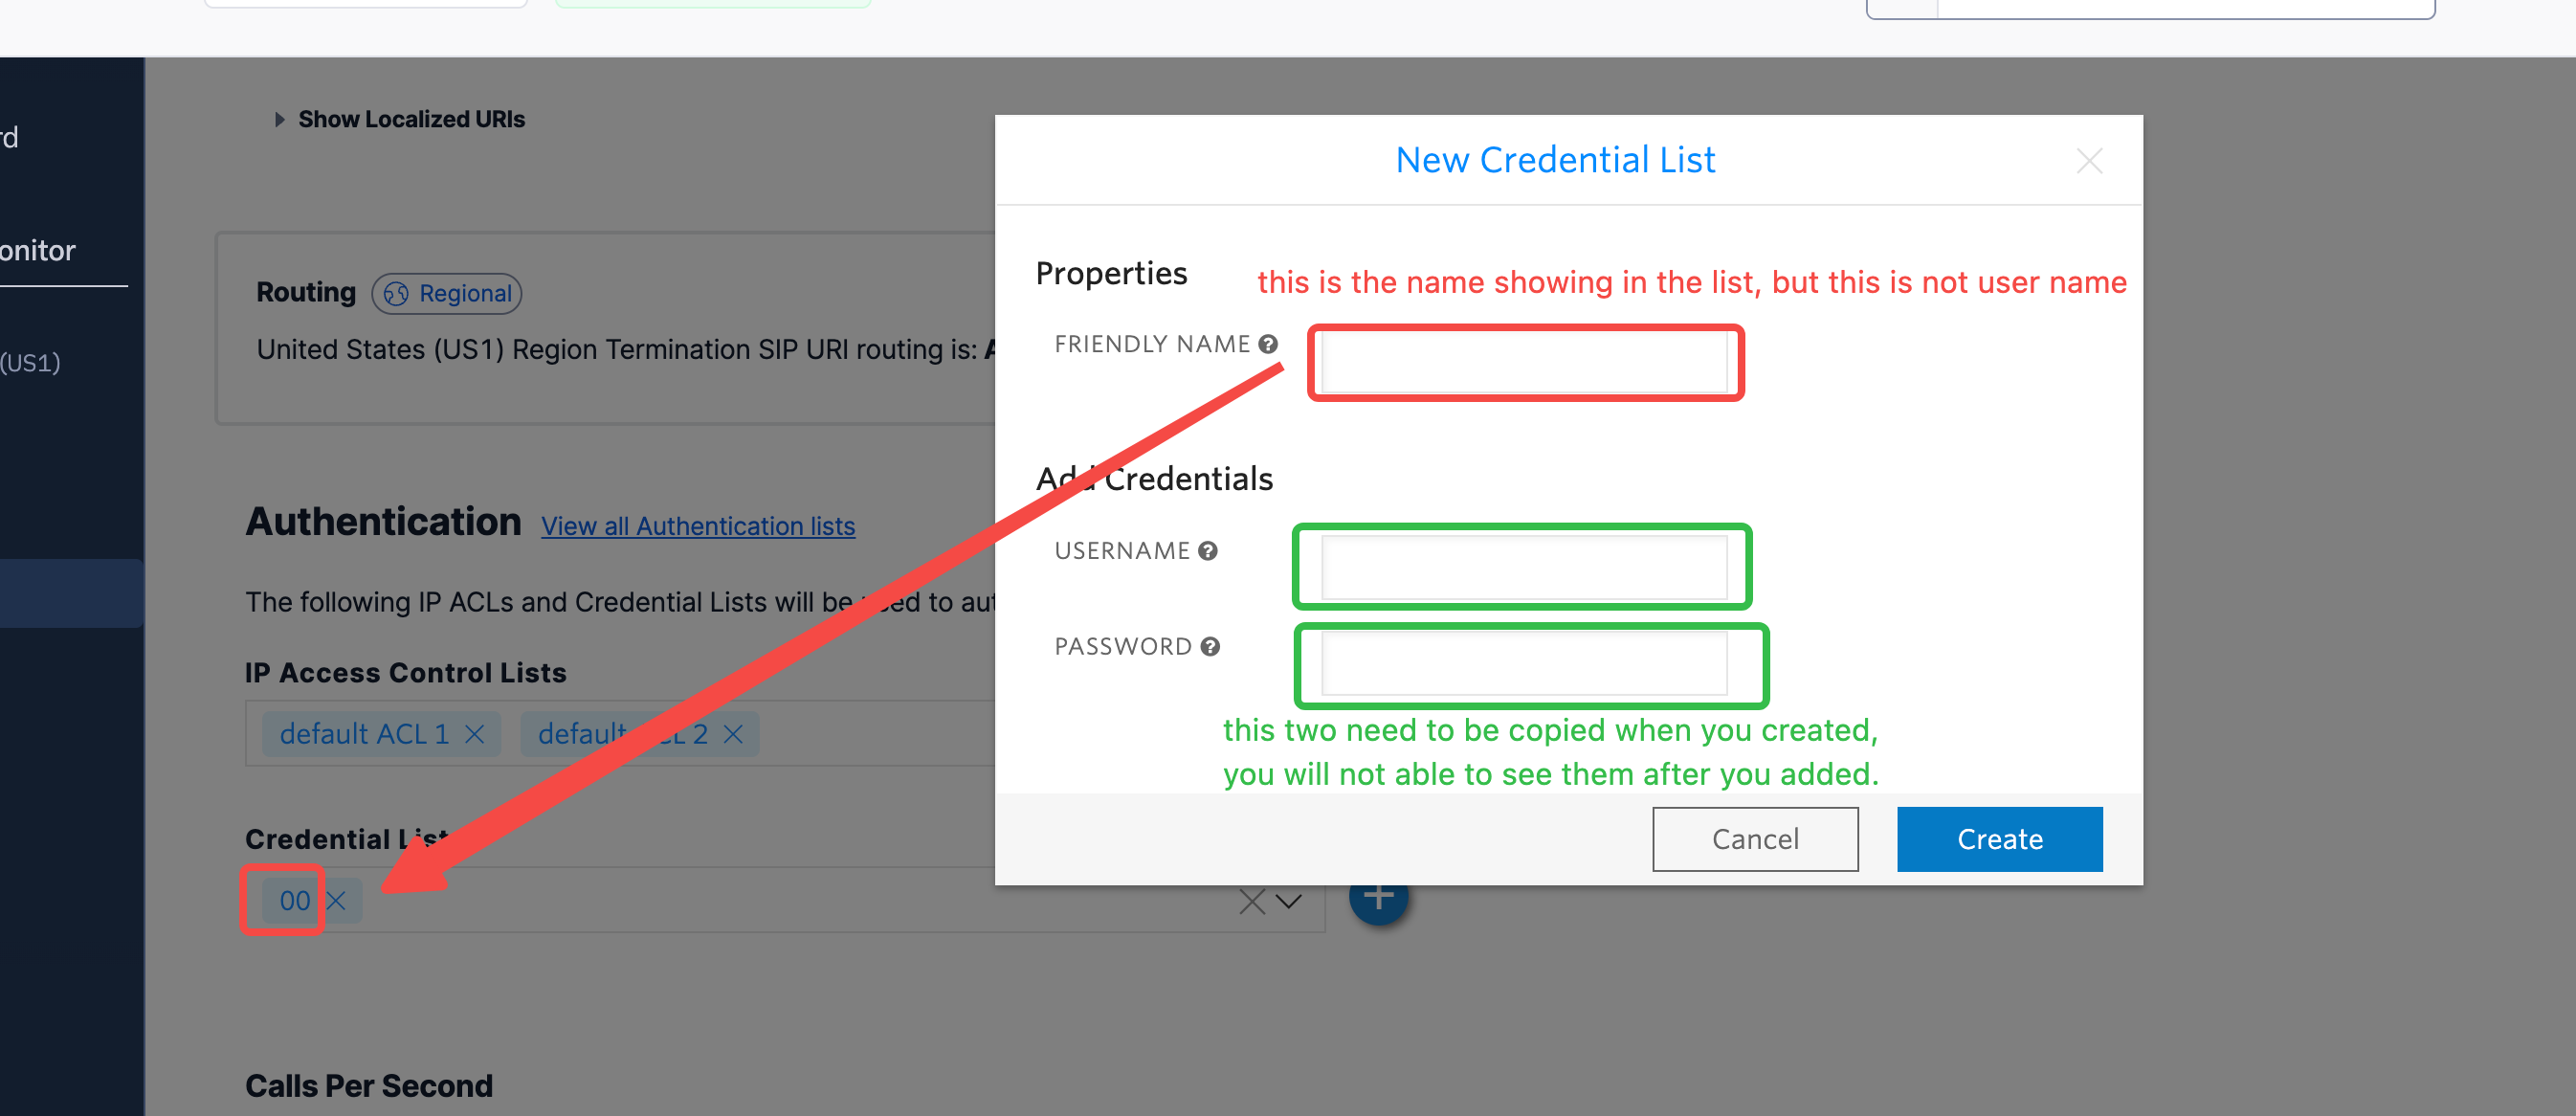
* Make sure you're using the correct username and password from the SIP Credential List.\
⚠️ *Important:* The **username is not the friendly name** shown in the Twilio Console. Double-check you’re using the actual SIP credential username.
You can also import a number programmatically using the\
****[Create Phone Number API](/api-reference/phone/create)****.
Now the number is imported, you can make and receive calls with this number — it will show up in your dashboard, and you can make phone calls from Dashboard directly. You can also use the ****[Create Phone Call API](/api-reference/call/create-call)****. to create calls programmatically. If you wish to **Sell Agent** to stop using this number, you can delete it from the dashboard or via the ****[Delete Phone Number API](/api-reference/phone/delete)****.
## Common Issues
**1. Inbound calls work, but outbound calls do not?**
* Check your Termination SIP URI ensure there are no spaces in your Termination SIP URI. Also, make sure you’re using a localized URI appropriate for your region.\
👉 Refer to [Twilio’s SIP Region Guide](https://www.twilio.com/docs/sip-trunking#termination-uri) to select the correct one.
* Make sure you're using the correct username and password from the SIP Credential List.\
⚠️ *Important:* The **username is not the friendly name** shown in the Twilio Console. Double-check you’re using the actual SIP credential username.
 **2. How do I enable international calling?**
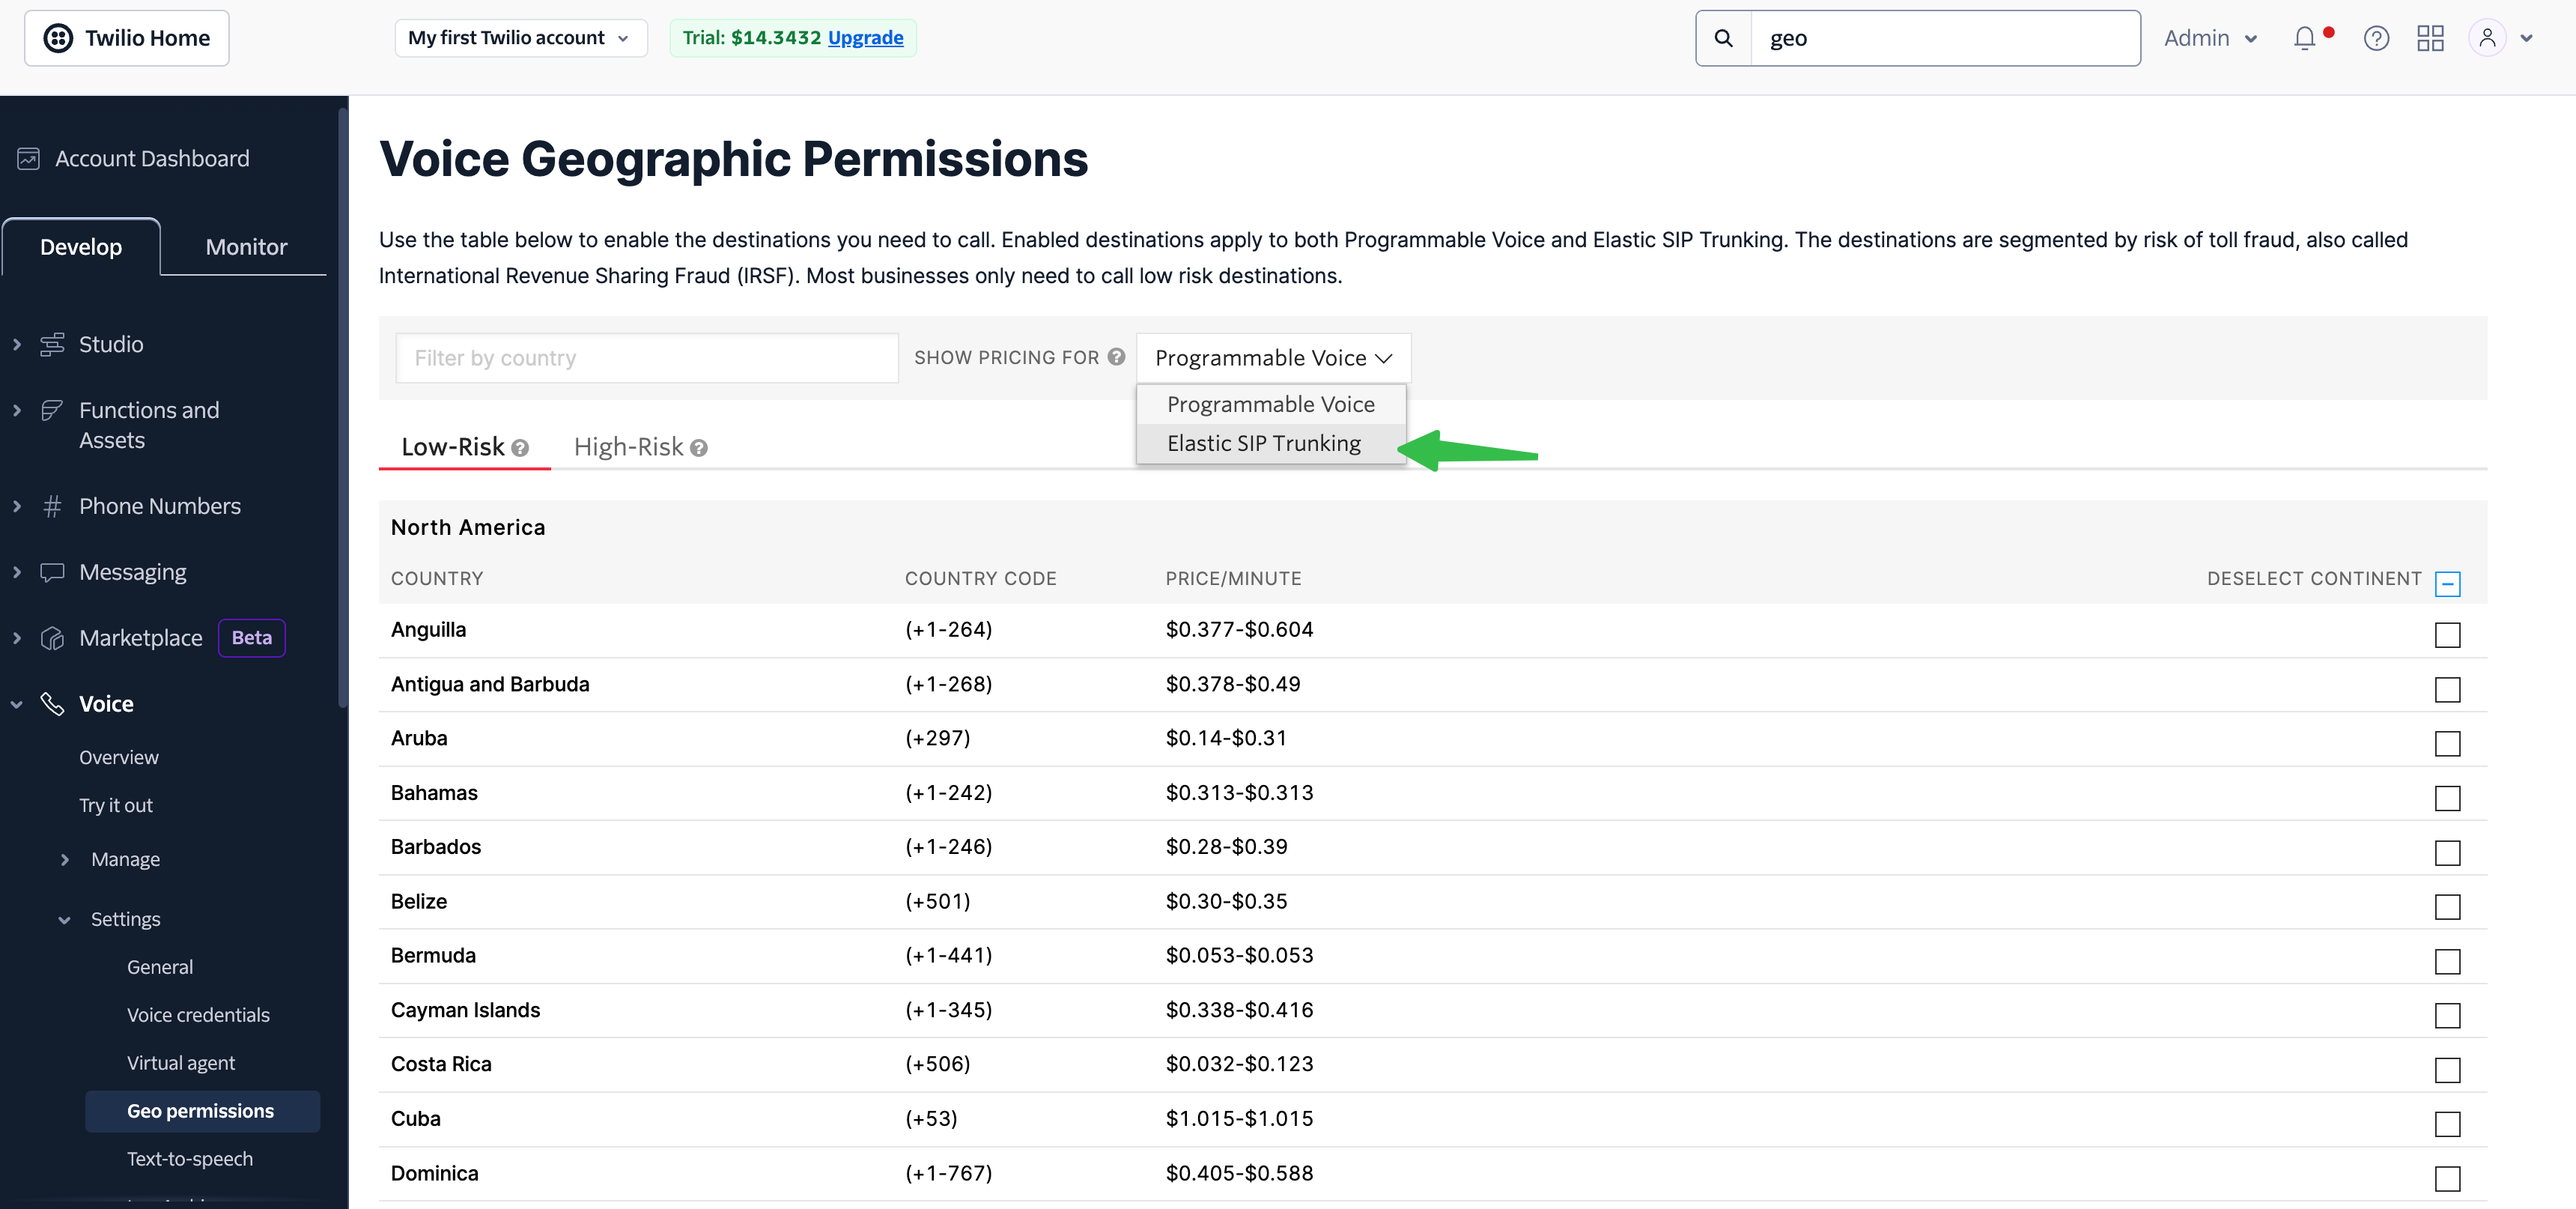
* In the Twilio Console, search for **"Geo"** to locate the **Voice Geographic Permissions** settings.
**2. How do I enable international calling?**
* In the Twilio Console, search for **"Geo"** to locate the **Voice Geographic Permissions** settings.
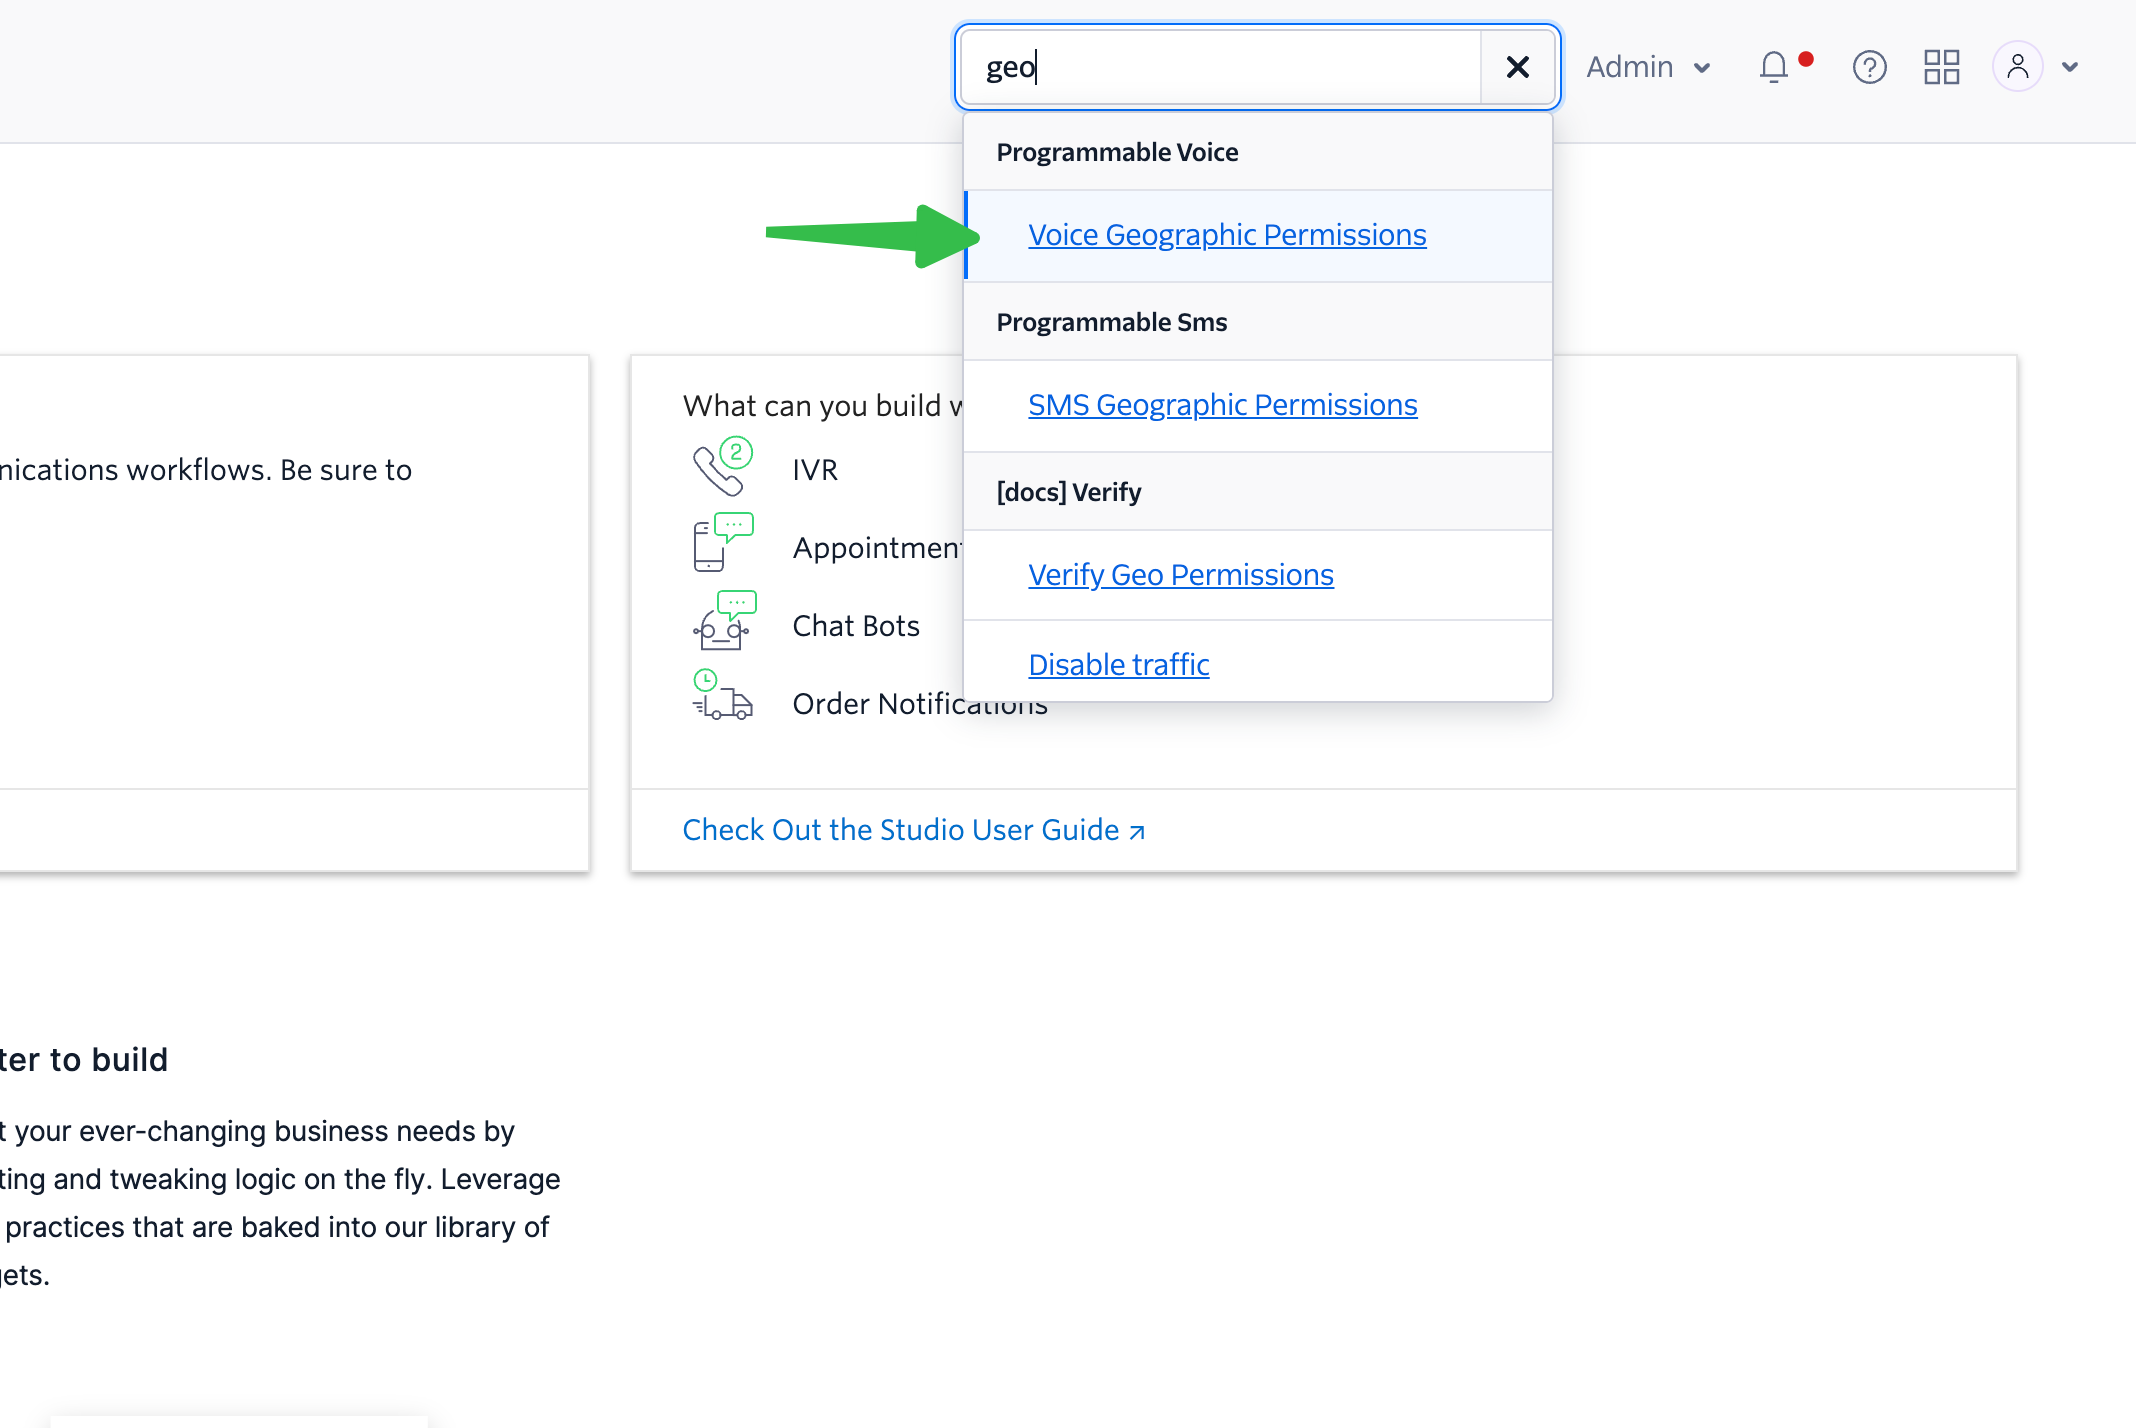 * Under the Product Selector, choose **Elastic SIP Trunking** and then enable the countries you want to allow for outbound dialing.
 ## 📘 Next Steps
Step-by-step video guide to set up a Twilio SIP trunk and connect it to **Sell Agent**.
## 📘 Next Steps
Step-by-step video guide to set up a Twilio SIP trunk and connect it to **Sell Agent**.