
You need: a Google account (for example your Gmail). It takes about 5 minutes.
Part 1: Get your Container ID from Google
1
Open Tag Manager
Go to tagmanager.google.com, sign in with your Google account and click Create account.
2
Name your account and container
Fill in the Add a New Account form: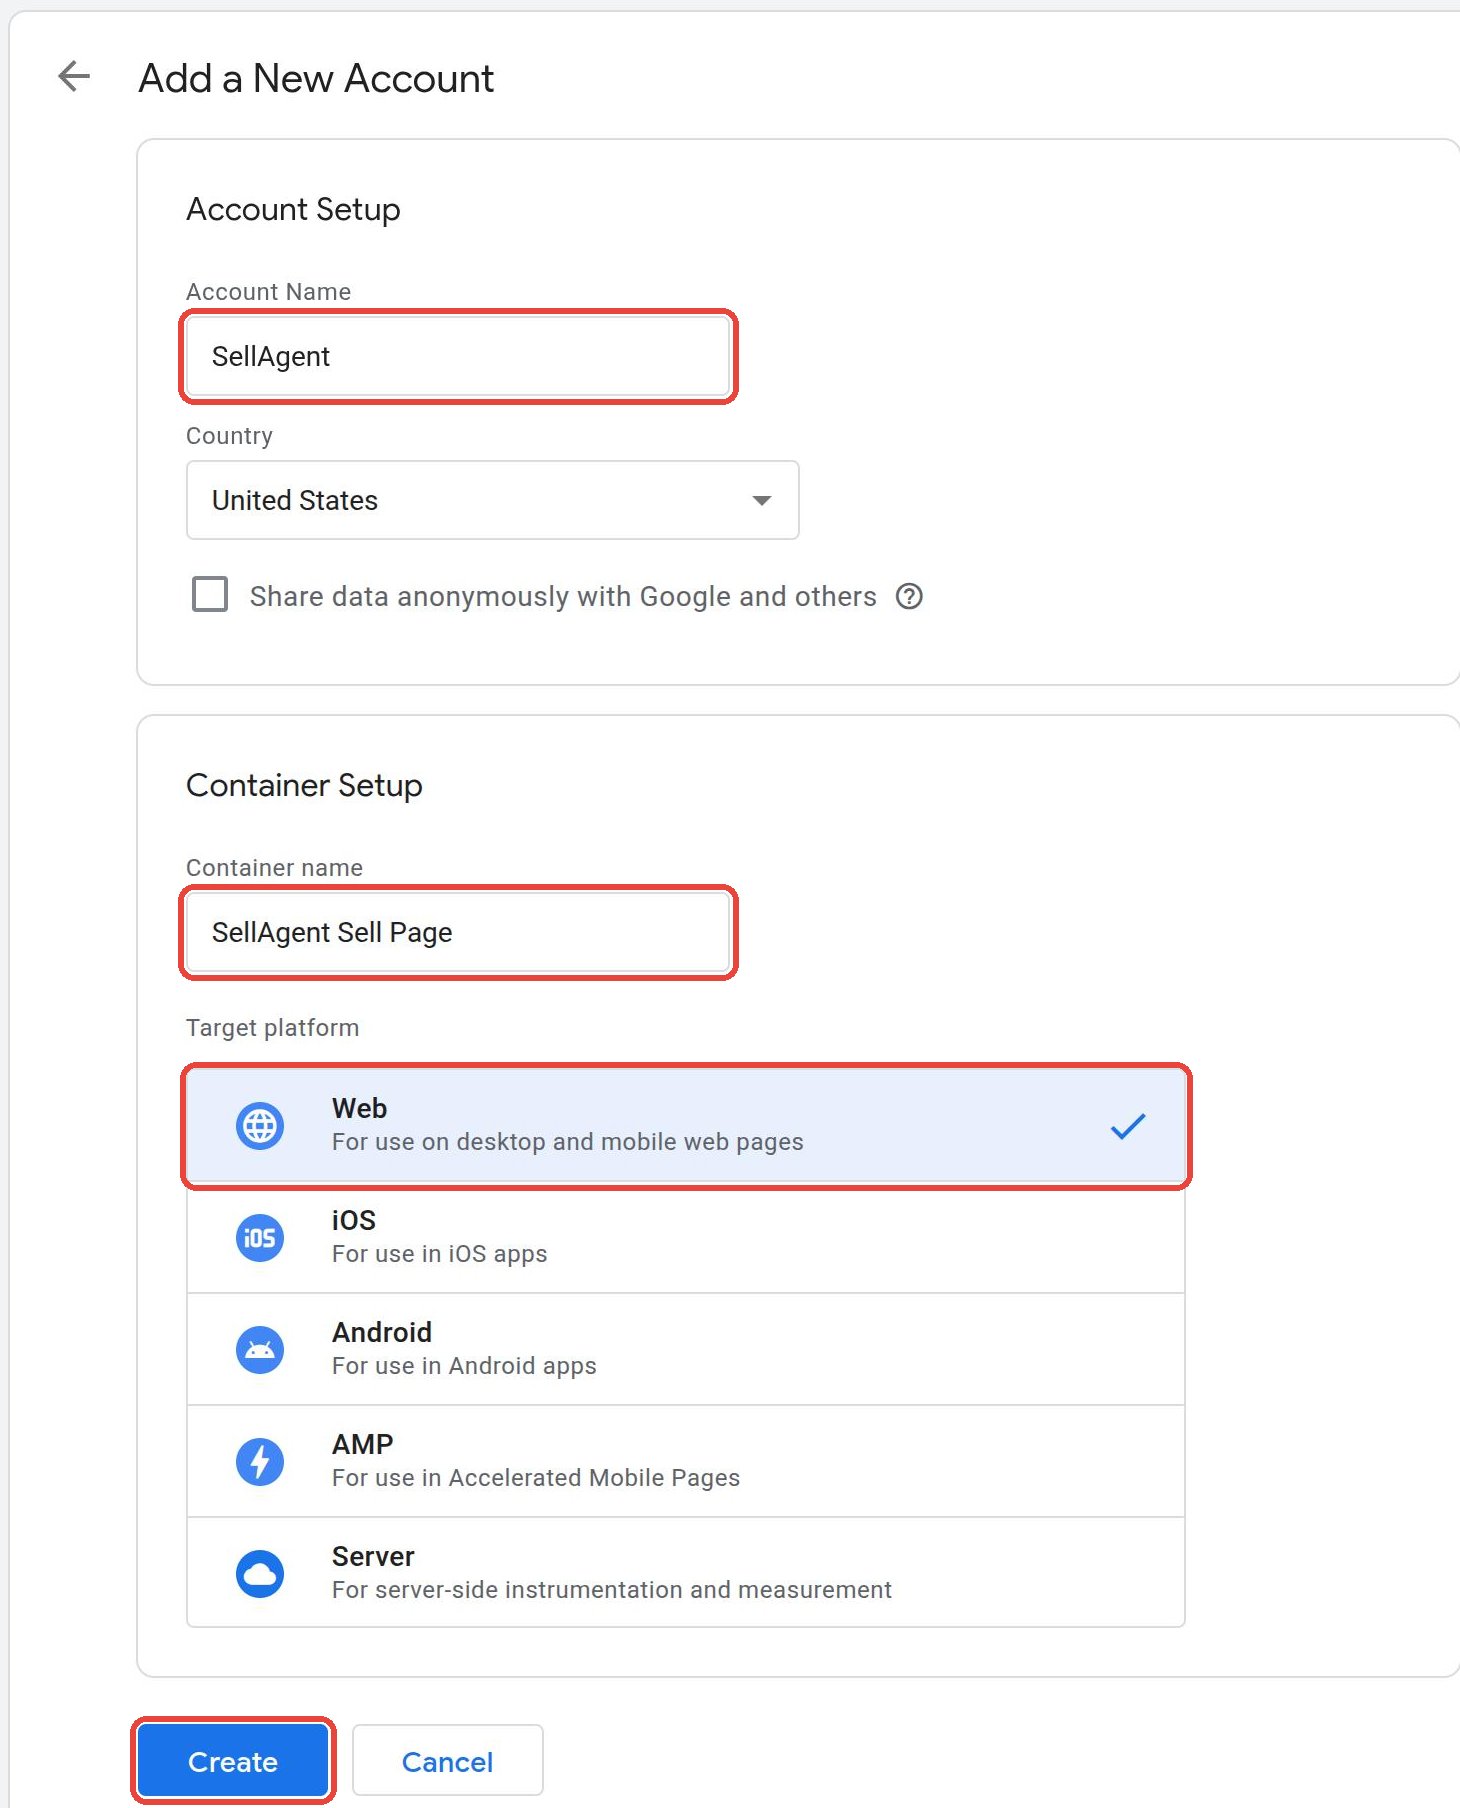
Leave Share data anonymously unticked, then click Create.
3
Accept the terms
A window with Google’s terms opens. Tick the box at the bottom (it may mention the GDPR) and click Yes at the top right.
4
Close the “Install Google Tag Manager” window
Google shows a window with two pieces of code. You don’t need them — SellAgent adds the code for you. Click OK to close it.
5
Copy your Container ID
You are now in your container’s Workspace. At the top, just left of Workspace Changes, you will see your Container ID (inside the red box below). It starts with GTM-, for example 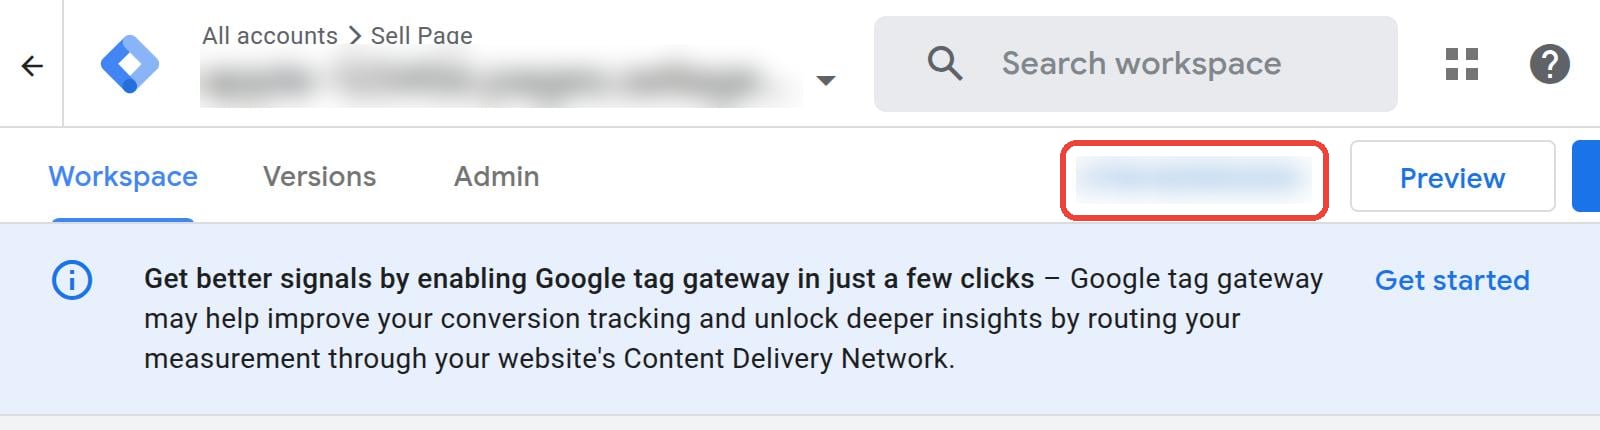
GTM-AB12CD3. Select it and copy it.Part 2: Add the Container ID to your Sell Page
1
Open Integrations
In SellAgent, open your Sell Page. Click Insights at the top, then Integrations on the left.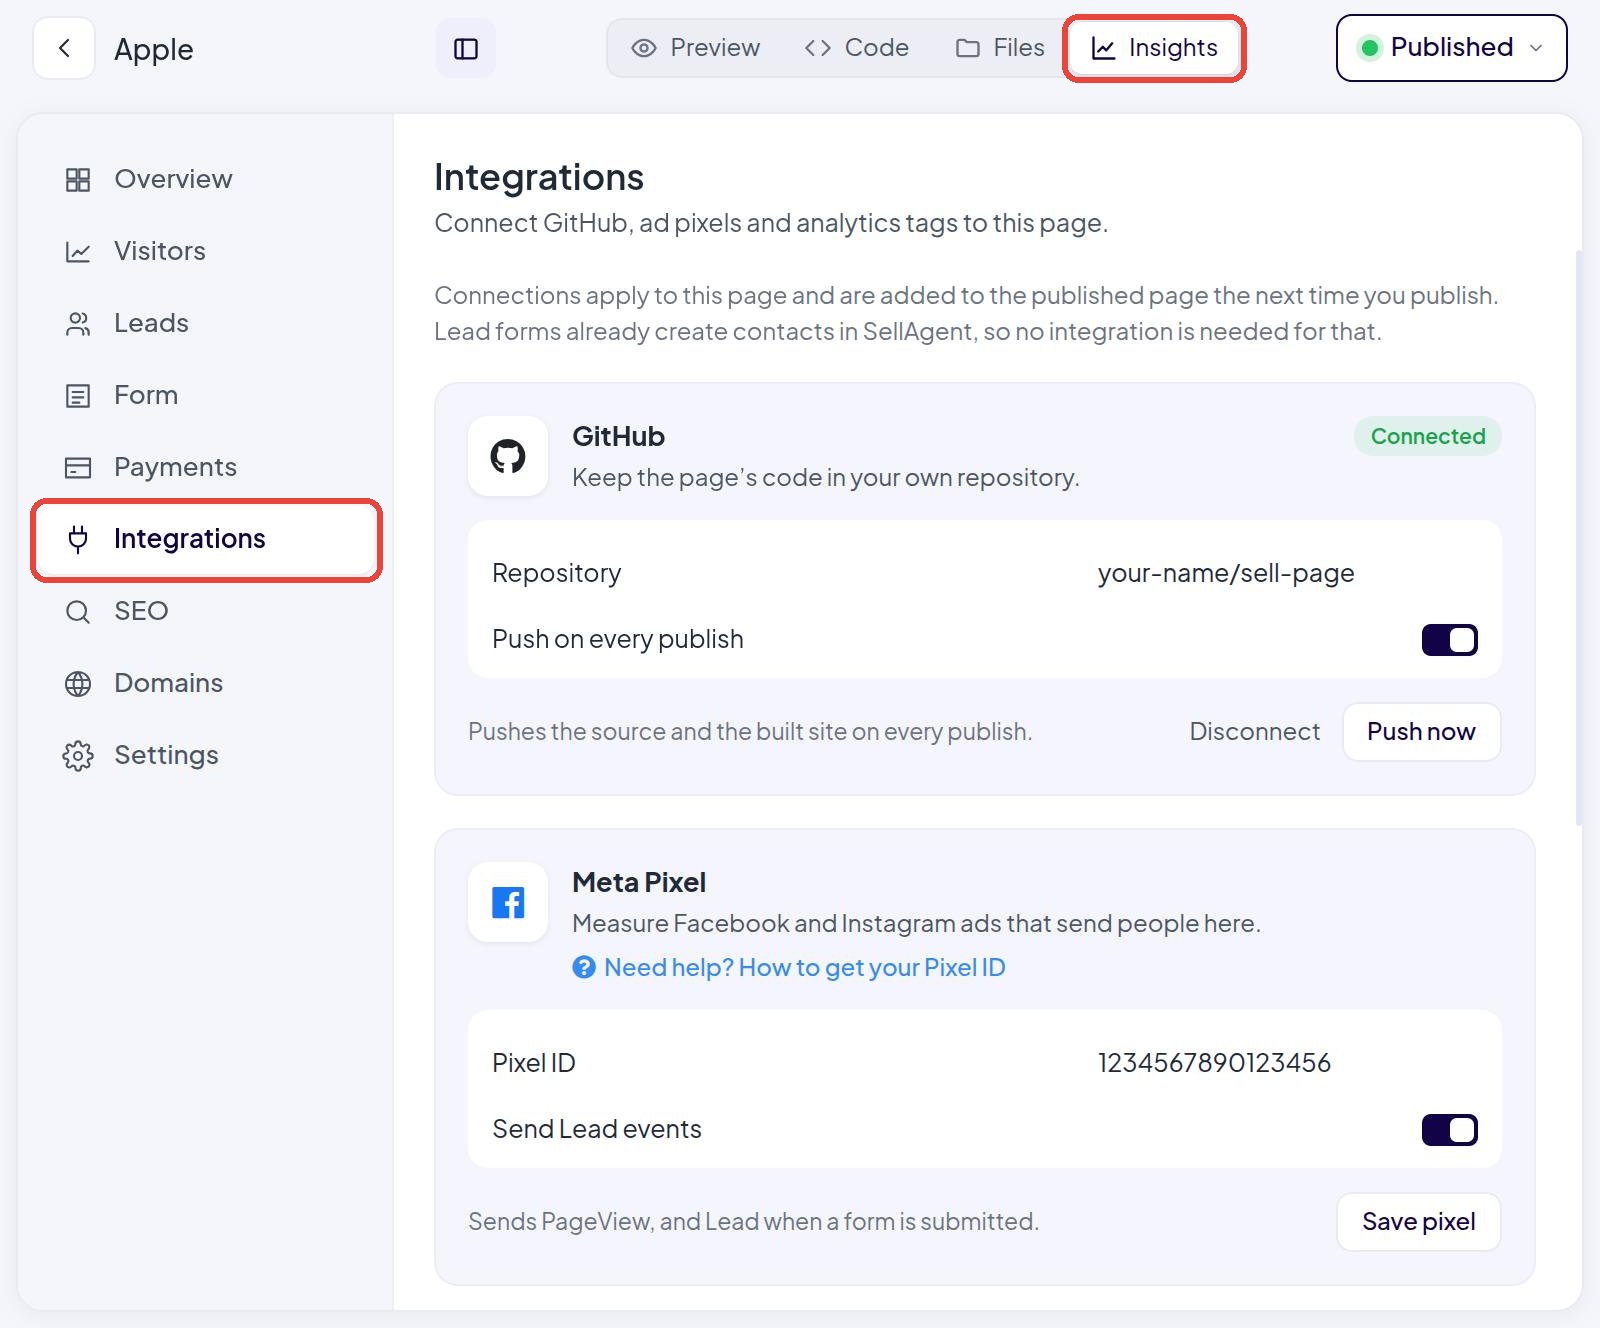
2
Paste the Container ID and save
In the Google Tag Manager card, paste your ID into Container ID and click Save.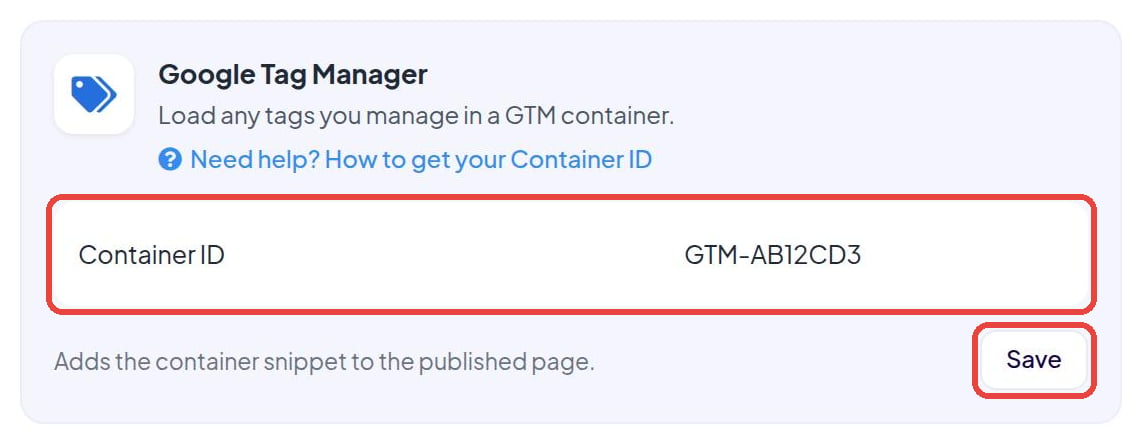
3
Publish your page
Click Publish (or Republish) at the top right. Tag Manager only loads on your live page after you publish.
Part 3: Check that it works
1
Open Preview mode
In Tag Manager, click Preview at the top right. Type your live Sell Page address and click Connect.
2
See your container load
Your page opens in a new tab and Tag Assistant shows what happens on it. You should see your container ID and events like Container Loaded and DOM Ready.Fill in your page’s lead form — a sellagent_lead event appears in the list.
A new container is empty, so Tag Assistant says “No tags were evaluated”. That’s normal — it means Tag Manager is connected and waiting for you to add tags.
Part 4: Add your tags
Everything you add here goes live on your Sell Page — no need to publish your page again.1
Add a tag
In Tag Manager, click Tags → New. Choose the tag type (for example Google Ads Conversion Tracking, TikTok Pixel from the Community Template Gallery, or Custom HTML for any code a platform gives you).
2
Choose when it fires
Under Triggering, pick:
- All Pages — to count every visit.
- SellAgent lead — to count form sign-ups (see below).
3
Publish your container
Click Submit at the top right, then Publish. Your tags are now live.
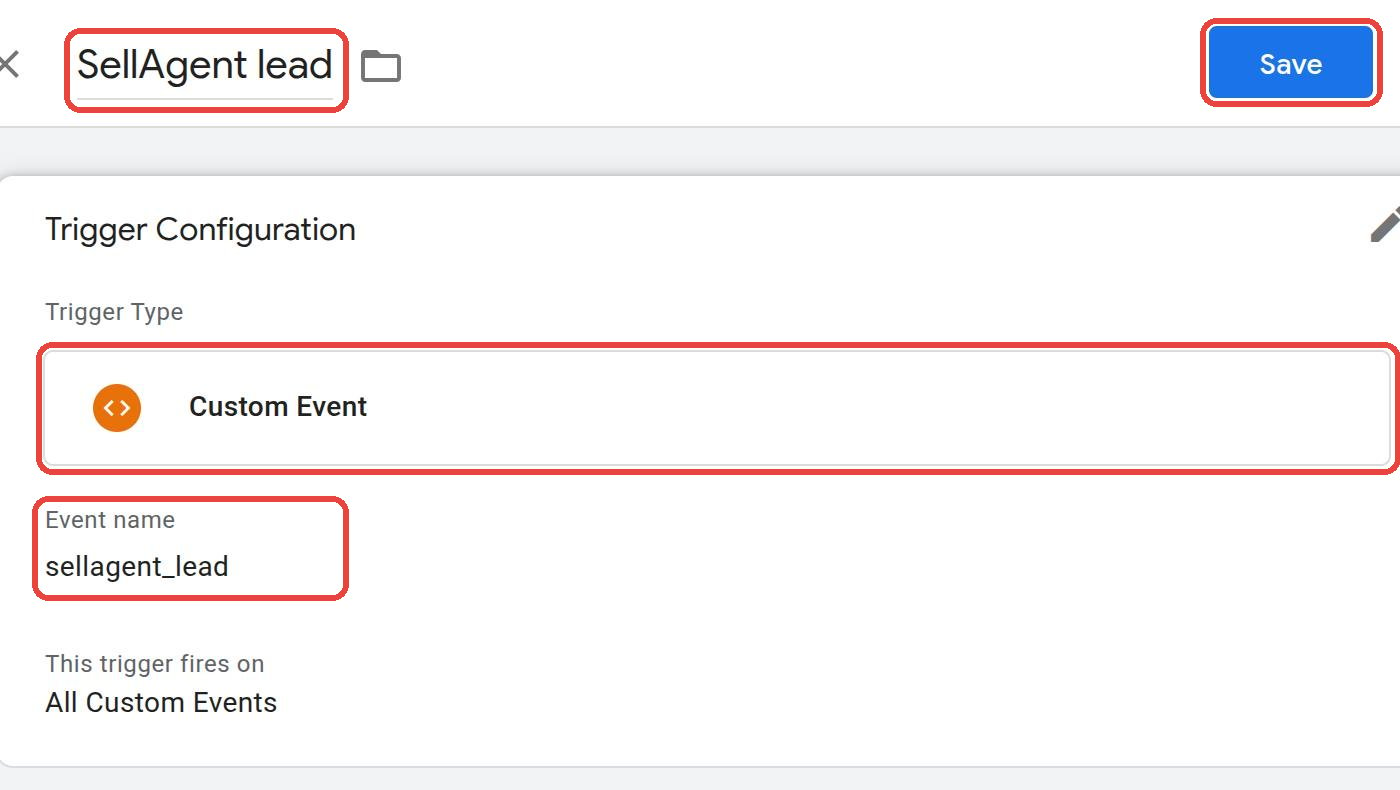
Count leads from your Sell Page form
Every time someone sends your page’s lead form, SellAgent tells Tag Manager with an event calledsellagent_lead. To use it:
- Go to Triggers → New and click Trigger Configuration.
- Choose Custom Event.
- In Event name, type exactly:
- At the top, click Untitled Trigger and rename it to
SellAgent lead. - Click Save.
Common questions
SellAgent says “The Container ID starts with GTM-”
SellAgent says “The Container ID starts with GTM-”
Copy only the ID that starts with GTM- (for example
GTM-AB12CD3), not the code Google showed you.Tag Manager says “No Recent Data”
Tag Manager says “No Recent Data”
- Make sure you clicked Publish in SellAgent after saving the ID.
- Click Submit → Publish in Tag Manager at least once.
- The quality check can take up to a day to update. Preview mode shows it working straight away.
Should I also fill in the Google Analytics card?
Should I also fill in the Google Analytics card?
Only if you don’t add Google Analytics inside Tag Manager. Using both counts every visit twice.