
- Every visit is counted as a PageView.
- Every time someone fills in your lead form, it is counted as a Lead.
You need: a Facebook account that can open Meta Business (the same one you use for ads). It takes about 5 minutes.
Part 1: Get your Pixel ID from Meta
1
Open Events Manager
Go to Meta Events Manager and log in with your Facebook account.
2
Create your business account (first time only)
If Meta asks you to create a business portfolio first, fill in:
Click Submit, then open the email from Meta and click Confirm. Come back to Events Manager.
Already run Facebook ads? You already have a business account — skip this step.
3
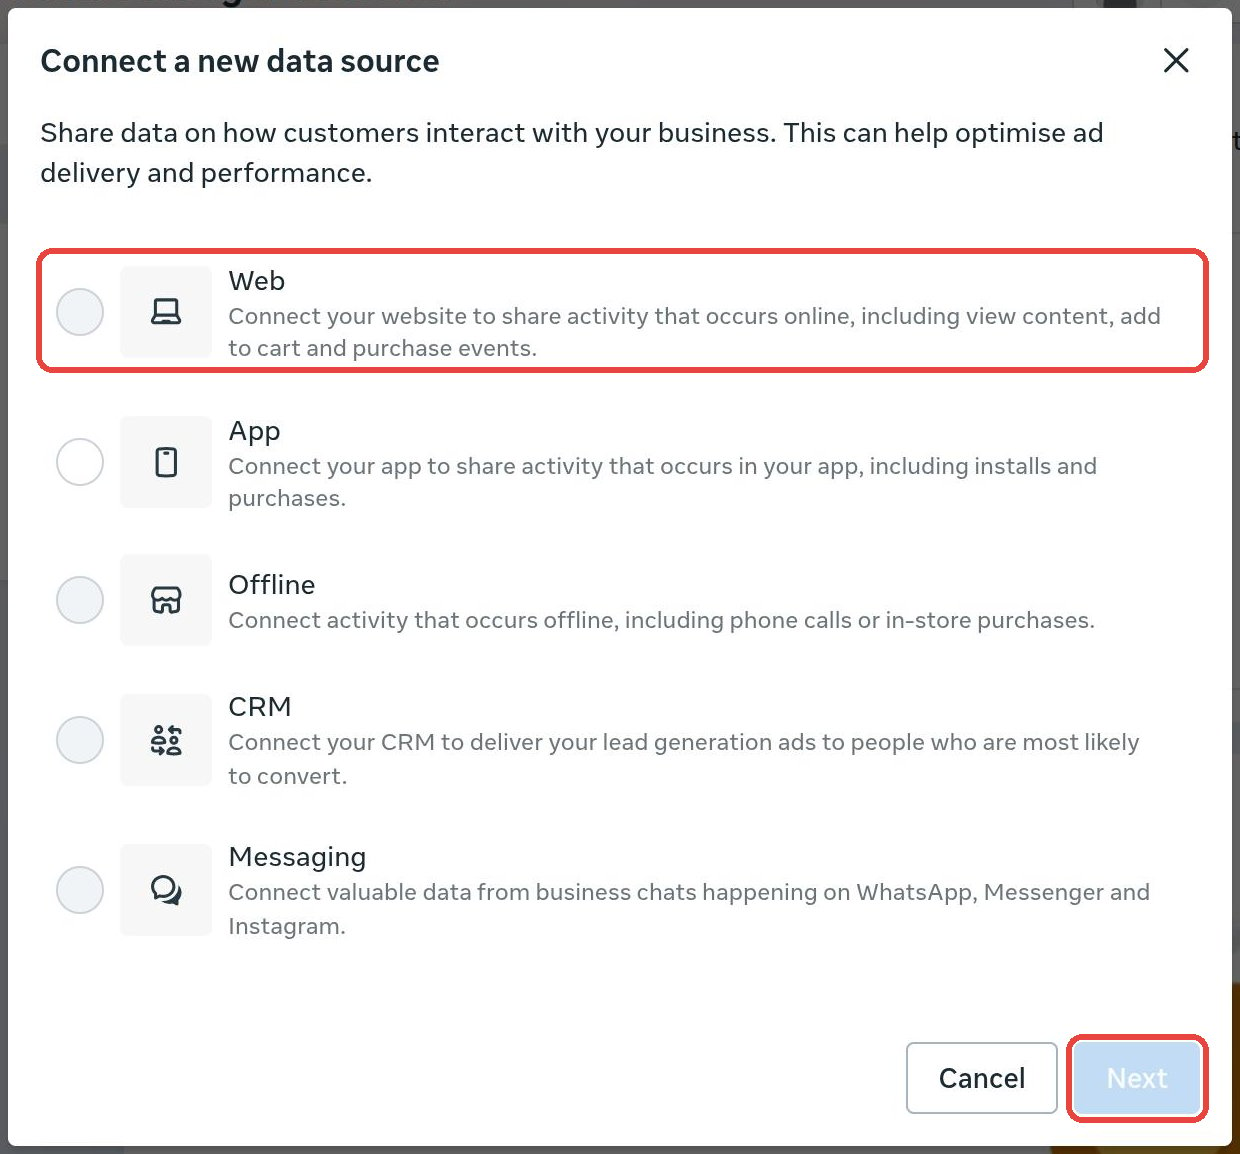
Click “Connect data” and choose Web
- Click the green ⊕ button (Connect data) at the top of the left menu.
- Choose Web.
- Click Next.
4
Name your pixel
Type a name you will recognise, for example:Click Create. If Meta asks for your website address, you can skip it or enter your Sell Page address — it doesn’t change anything.
5
Close the “install code” window
Meta now asks how you want to add the pixel code to your website (Install code manually or Check for partner).You don’t need either — SellAgent adds the code for you. Click the X in the top-right corner to close the window.
6
Copy your Pixel ID
Your pixel now shows under Datasets. The ID is the long number right under the pixel’s name (inside the red box below). It has 15 or 16 digits.Select the number and copy it.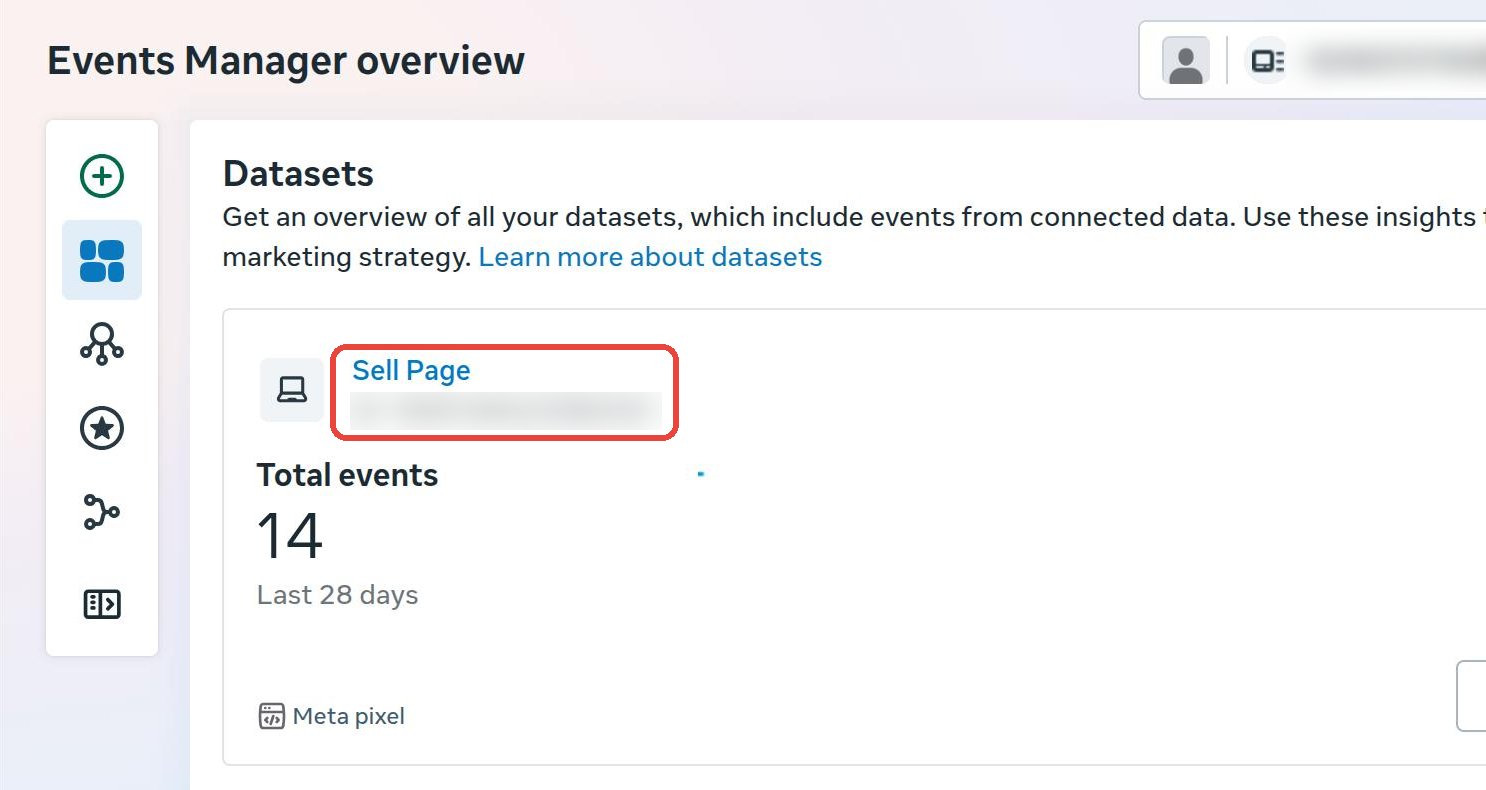
Part 2: Add the Pixel ID to your Sell Page
1
Open Integrations
In SellAgent, open your Sell Page. Click Insights at the top, then Integrations on the left.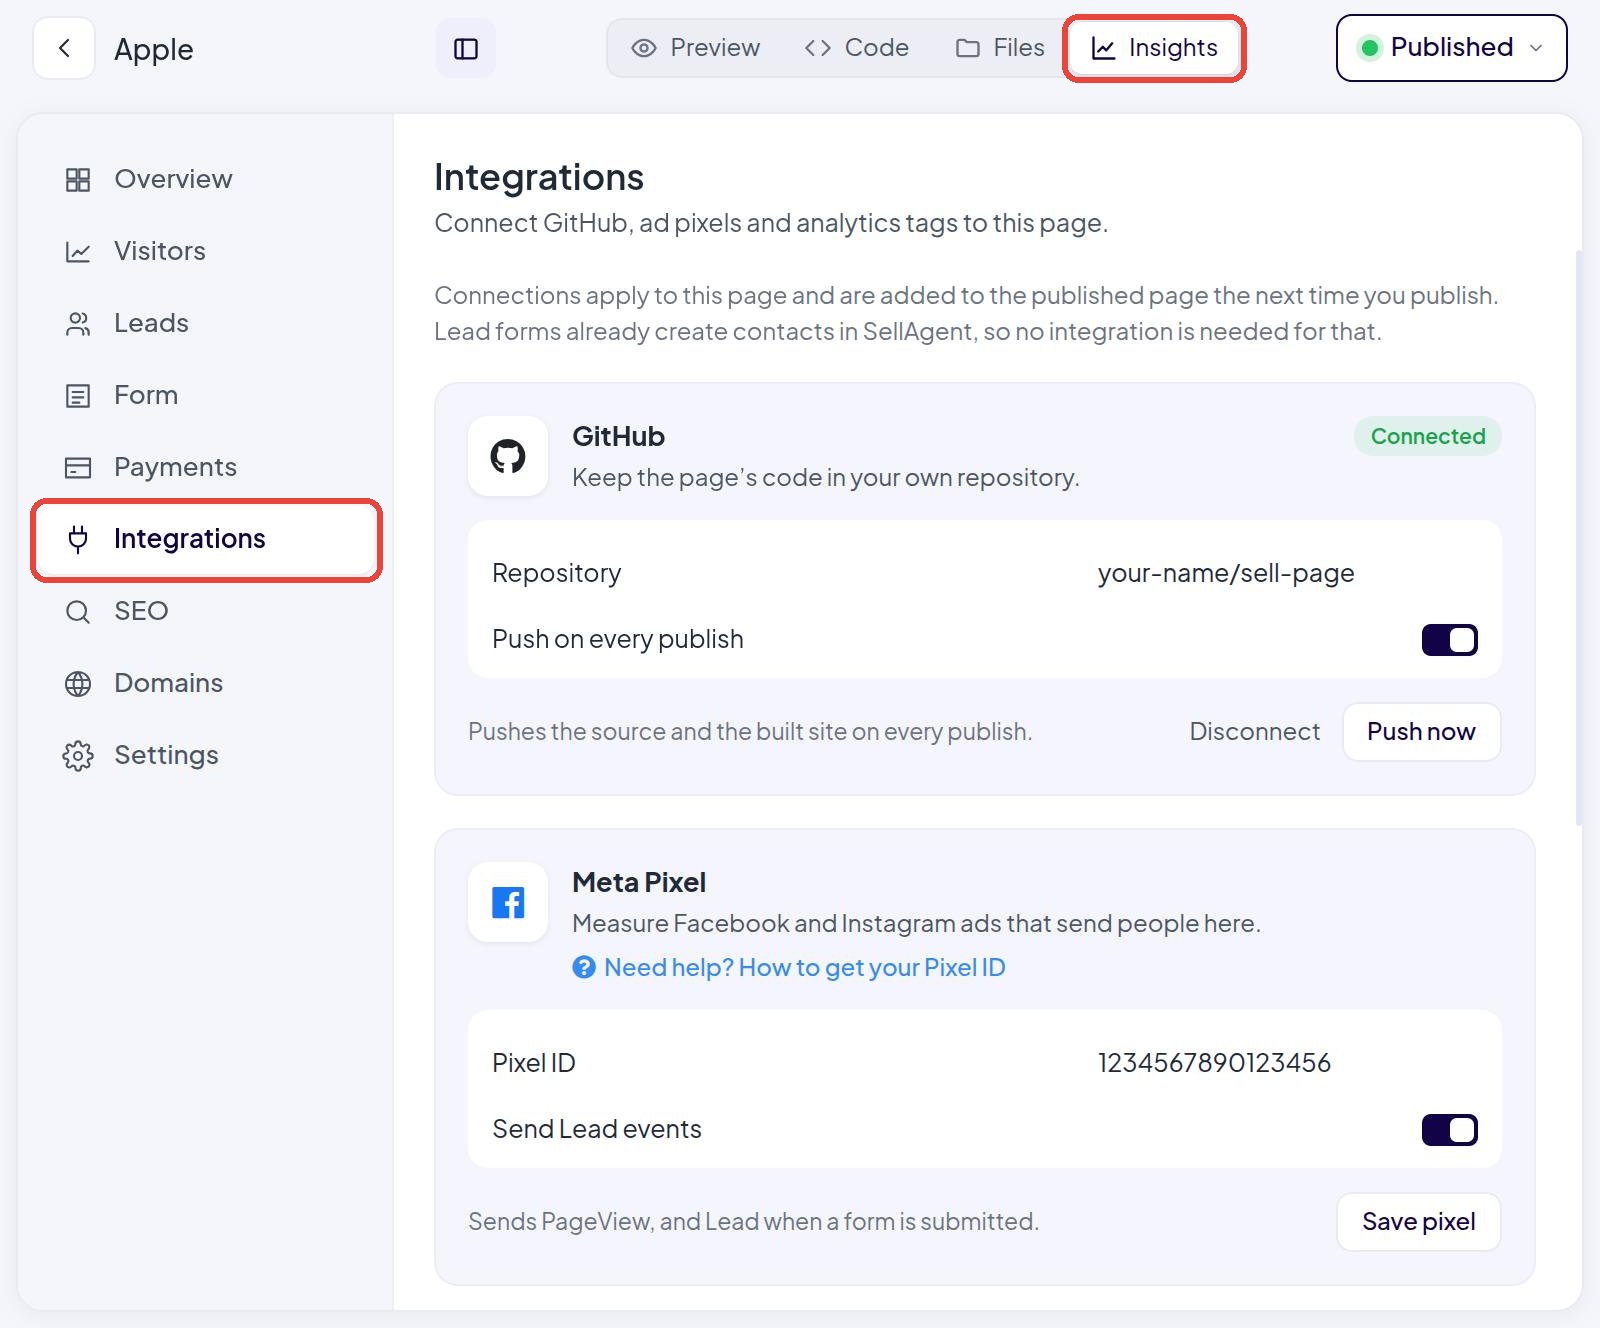
2
Paste the Pixel ID and save
In the Meta Pixel card: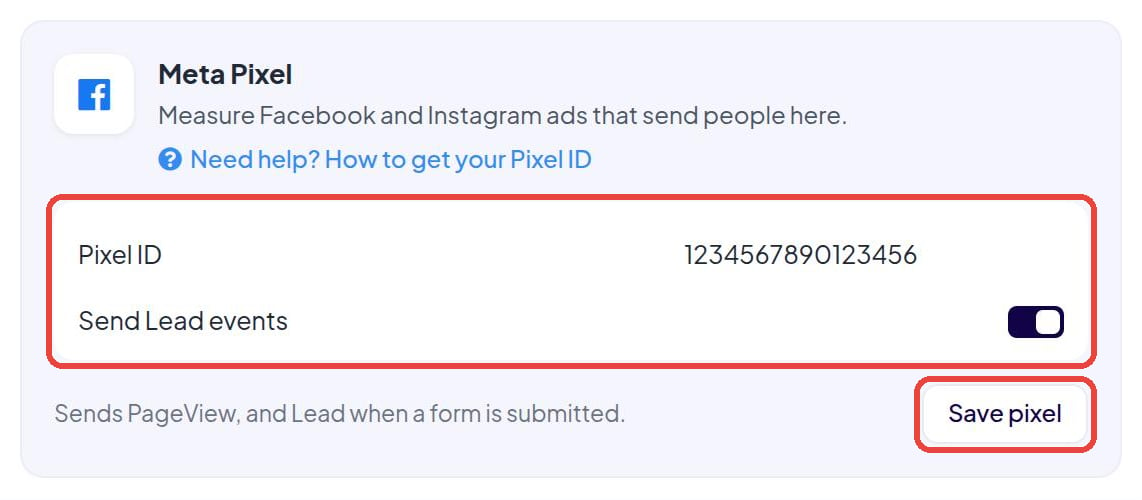
- Paste your number into Pixel ID.
- Leave Send Lead events switched on, so form sign-ups count as leads.
- Click Save pixel.
3
Publish your page
Click Publish (or Republish) at the top right. The pixel only starts working on your live page after you publish.
Part 3: Check that it works
1
Open your live page
Open your published Sell Page in Google Chrome. Turn off any ad blocker first — ad blockers stop pixels from working.
2
See the events arrive
In Events Manager, click your pixel and open the Test events tab. Within a few seconds you should see:
- PageView — when the page opens.
- Lead — after you fill in and send your page’s lead form.
The Overview page in Events Manager can take from 20 minutes to a few hours to show your first events. The Test events tab shows them straight away.
Common questions
SellAgent says “The Pixel ID is the 15–16 digit number”
SellAgent says “The Pixel ID is the 15–16 digit number”
You copied something else. Go back to Events Manager and copy only the number under your pixel’s name — digits only, no spaces or letters.
Events Manager still shows 0 events
Events Manager still shows 0 events
- Make sure you clicked Publish after saving the Pixel ID.
- Turn off ad blockers and open your live page again.
- Wait a while — the Overview page is slow. Check the Test events tab instead.
Lead events are not showing
Lead events are not showing
- Check that Send Lead events is switched on in the Meta Pixel card.
- Your page needs a lead form. Add one in Insights → Form.
- A Lead is only sent after the form is sent successfully (you see the “Thank you!” message).
Can I add more than one pixel?
Can I add more than one pixel?
The Meta Pixel card holds one pixel. To add more pixels or other tags, use Google Tag Manager.
How do I remove the pixel?
How do I remove the pixel?
In the Meta Pixel card click Remove, then publish your page again.